GRUB is abbreviated as GRand Unified Bootloader is the Boot Loader for Linux OS. The GRUB is the most important part of the Linux OS. GRUB is the Boot Loader for Linux, hence without these Linux OS cannot be booted or start. why it is called as the most important part in the Linux Booting process. When this GRUB is damaged or corrupted its core files your Linux OS cannot be booted then this tutorial is useful for the rescue and recover of the corrupted GRUB on RHEL/CentOS/Scientific/Oracle Linux 6/5. Sometimes it may happen that you found your grub corrupted so that you can’t log in into your Enterprise Linux OS. So for that I am providing a technique to recover and rescue your corrupted GRUB into new one.
Introduction to the GRUB
GRUB is a Boot Loader that loads before the operating Systems Load. GRUB is that the reference implementation of the Free package Foundation’s Multiboot Specification, that provides a user the else one in every of multiple in operation systems put in on a laptop or select a particular kernel configuration out there on a selected in operation system’s partition.
The GRUB may be a Multiboot Boot Loader. it had been derived from GRUB, the GRand Unified Bootloader, Briefly, a Boot Loader is that the 1st package program that runs once a laptop starts. it’s accountable for loading and transferring management to the OS kernel package. The more details and source files of GRUB can be found at official website of GRUB.
Rescue & Recover the Corrupted GRUB on RHEL/CentOS/Scientific/Oracle Linux 6/5
Insert the RHEL/CentOS/Scientific/Oracle Linux installation DVD and Boot with the DVD and follow the given Steps:
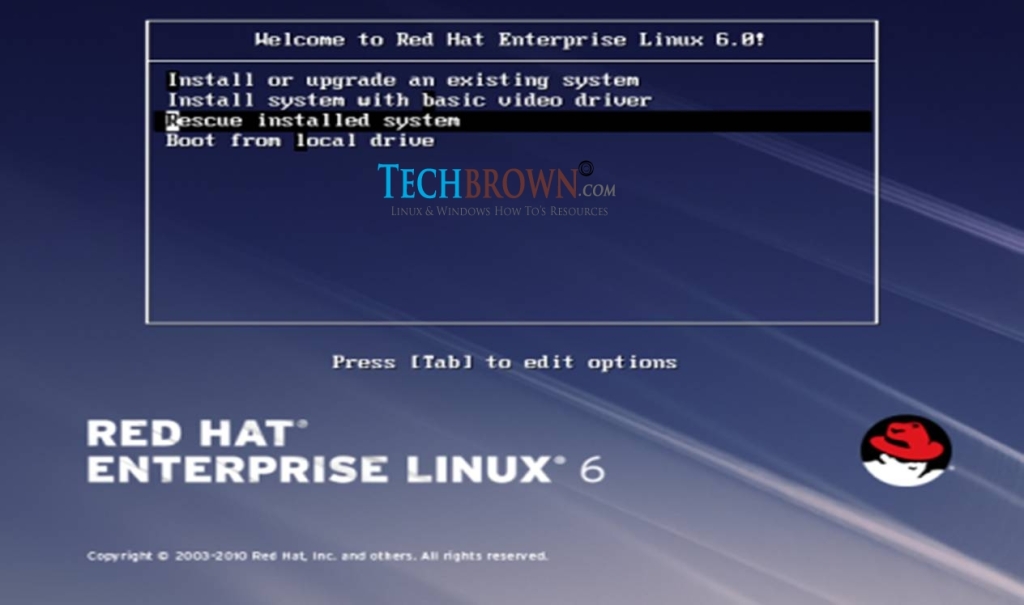
Step-I(Select and Hit Rescue Installed System)
The following window will open So then press on Rescue installed system or Boot from local drive (It will Boot from your local drive it takes previous stage of your) but in this tutorial I am trying it using Rescue Installed System.
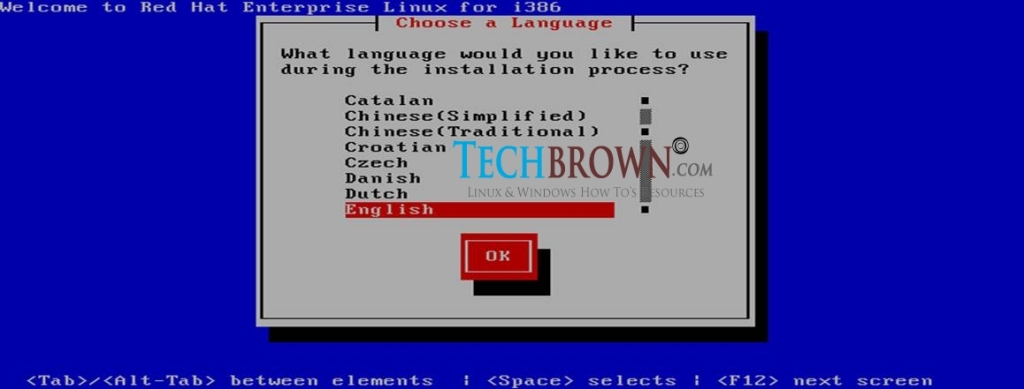
Step-II(Choose the Language)
Choose the Language and hit Enter
Step-III(Select Keyboard Type)
Select the Keyboard Type and hit Enter
Step-IV(Starting of Rescue Mode Select the Rescue Image or Media)
Select Local CD/DVD
Step-V(Setup of Networking)
It will ask you about to setup Networking. To set a network you can watch my other tutorial, actually you should setup a network, but right now we are just learning about grub so don’t setup your network we will do it later. Just press on NO and proceed to further process.
Step-VI(Starting of Rescue Screen)
Now it will take you to the Rescue screen. So let’s discuss about the options which it provide.If you have a problem in the file system area I recommend Skip option. But here we want to recover our grub so we use Continue option so that it will mount your system under /mnt/sysimage.
Step-VII(Select Mount point for Rescue)
Click on OK to Mount your system under /mnt/sysimage. Now to work in the root environment runs chroot /mnt/sysimage command.
Step-VIII(Final Mount Point for Rescue Screen)
Read the info and hit OK.
Step-IX(First Aid Kit for Recovery and rescue)
After this Hit on start shell to enter in the shell prompt.
Step-X(Rescue and Recover the corrupted GRUB)
After hitting you will see the following lines below this.Now to work in root environment just press in front of bash prompt.
In Bash prompt use this command
bash-4.1# chroot /mnt/sysimage
sh-4.1# grub-install /dev/sda
sh-4.1# exit
bash-4.1# exit
Step-XI(Exit from the Rescue Mode)
Just hit on Reboot to restart the systems.
After this just let the system reboot and don’t panic if you see the overwritten screen just let it be. It will take 3 to 4 minutes, so in meanwhile hear a song and be happy. After all this process, you are now free to use your Linux.
Final Result
That’s all now, you have just Rescue & Recover the Corrupted GRUB on Linux Distributions.You are now ready to use the GRUB Boot Loader on your systems. Just Boot to the Systems and to see the action of the GRUB. Ensure that the GRUB is integrated perfectly with the Linux systems. Enjoy the Multi-Boot GRUB on your system. Any difficulties regarding the Rescue & Recover the Corrupted GRUB and use the comment section below.

